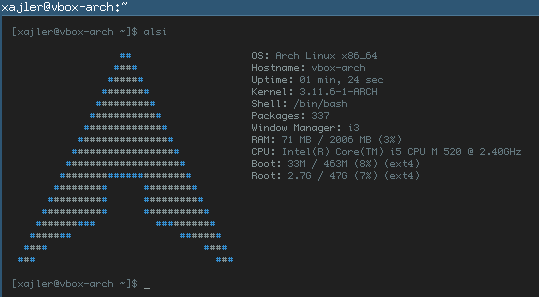
For a few years now I really wanted to get some time to learn/install and play around with ArchLinux. ArchLinux is very minimal, highly customizable, but powerful distribution of Linux based on one of oldest distribution Slackware and BSD like Unix.
ArchLinux is not for everybody, if you want everything out-of-box, then probably Ubuntu, Mint, Fedora or like are for you. But for me, and I have Mac, I see no difference between Ubuntu and Mac. Because for both, out-of-box you’ll get a predefined UI, apps. I’m not going into discussion that most of this can be change in Ubuntu, but how much of them really change?
ArchLinux is completely opposite, the install is not really easy (for average PC user), nor GUI like, and after install you are left with bare minimal packages needed for OS to run and configure, and without GUI too.
This installation is not for Linux n00bs, some familiarity with console and Linux commands should be expected, because some of notes are really not in depth and there are thing assumed, like basic knowledge of vim (or you can replace vim with nano).
This is all part of my learning ArchLinux, and then to dual boot it on my Mac with Mac OS X. And even though I really like Mac, I really have huge respect and likeness for Linux, and my minimalistic side was in real need of distribution like ArchLinux. Why ArchLinux?
Just look into their wiki, that much of content and expressiveness (sometimes maybe too much) it is really what it makes ArchLinux great, and second is the Arch User Repository (AUR) where you can search for packages, install and comment them (very helpful comments!).
Another strength is that ArchLinux has no release versions, it is rolling released distribution, and if you update weekly or monthly, you’ll always have latest versions of your applications and ArchLinux respectively. Another strength (that is for someone is weakness) is that mostly ArchLinux packages are latest stable releases of software, and even this can get you to dependency hell, in most cases, you’ll end up with latest software with all new features and bug fixes immediately, and not waiting for next version release of OS distribution.
Note:
I use Dvorak keyboard layout and it is throughout the installation, if you use
uslayout ignore all of it, but if you use some other layout e.g.hrthen replace wheredvoraktohr!
VirtualBox Pre-installation
- Download, install and create new VirtualBox machine, for ArchLinux x64.
- Download “dual” ISO from ArchLinux mirrors.
- Add ISO to VirtualBox and set it for CD/DVD.
Installation
Choose x86_64 version.
Change to Dvorak layout:
1
| |
Ping google.com to see if there is Internet connection, if not run:
1
| |
Update pacman package manager repository:
1
| |
Install vim as a default editor for installation (even though you can use installed plain old vi or nano):
1
| |
See what disk structure there is:
1
| |
For MBR installation use cfdisk:
1
| |
Create new partition with choosing [ New ] with 1024 Mb for boot directory (not necessary!).
Make it bootable by choosing [ Bootable ].
Create new partition with choosing [ New ] with rest of your disk space for root folder.
Create filesystems:
1 2 | |
Mount partitions and create boot dir, for boot partition:
1 2 3 | |
Change mirror for pacman, I use anything in Germany, and paste to top of mirrorlist:
1
| |
Install base and devel system (this can take for while, so better choose good mirror to be fast as possible!):
1 2 | |
Generate fstab and check it:
1 2 | |
Chroot and configure system
Chroot to mnt:
1
| |
Create custom Keyboard Layout in vconsole.conf, and and add keyboard map for Dvorak:
1 2 3 4 5 | |
Update with pacman and install vim (again, omit if you’re using vi or nano):
1 2 | |
Set up locale, for me uncomment en_US UTF-8 in locale.gen:
1 2 | |
Create locale.conf and export locale:
1 2 | |
Set Time Zone by linking to time zone info to localtime:
1 2 3 4 5 6 7 | |
Set Hardware Clock to UTC:
1
| |
Set Hostname:
1
| |
Configure Network:
1
| |
Root passwd and new sudo user
Set root password:
1
| |
Create new user that will be sudo:
1
| |
Install sudo with pacman:
1
| |
Uncomment wheel group from sudoers ”%wheel ALL=(ALL)”, so that user just created can be sudo:
1
| |
Set password to created user:
1
| |
Bootloader
Since we use MBR not GPT lets install GRUB BIOS bootloader:
1
| |
Install and configure GRUB to /dev/sda:
1 2 | |
Exit chroot, unmount mounted partitions and reboot:
1 2 3 4 | |
Post Install
Install Yaourt from archlinuxfr, for easier interaction/installation from AUR.
Add archlinuxfr repository to /etc/pacman.conf:
1 2 3 | |
Update pacman and install yaourt:
1
| |
GUI
Install X server:
1
| |
Install mesa for 3D support
1
| |
VirtualBox
Install Guest additions:
1 2 | |
Create virtualbox.conf in /etc/modules-load.d
1
| |
Add modules guest and video to virtualbox.conf:
1 2 3 | |
Log or su as created user.
Copy .xinitrc and add following content:
1 2 3 4 5 6 | |
Setup keyboard (non US)
We did setup for console now we need to set up for X:
1
| |
Test X
Install xterm, xclock and lwm:
1
| |
Start X
1
| |

This is a first part of ArchLinux covering installation, configuration and testing that X or GUI is functioning properly. Next part is installing and configuring Window Manager. And since the Gnome and KDE are most popular, we will not use them at all! Intention is to use Tiled Window Manager…