OK, so we created the skeleton of App. While creating the Xcode Project we could add the project to Git repository, but we didn’t, we shall do it manually and finally at the end we shall push it to the Github hosted repository.
Git Repository
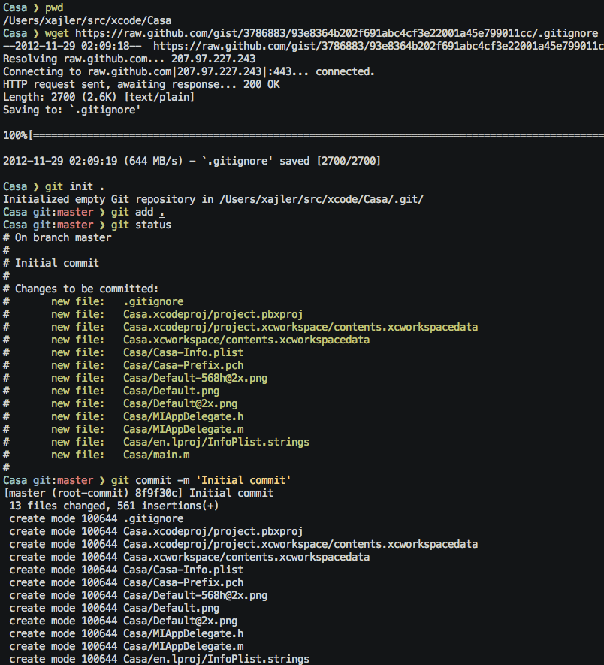
Firstly we really want to add a proper Xcode and Objective-C .gitignore file. Here is the
Gist link to one proper .gitingnore. Download and copy
it to the App root, before doing the first commit or use wget as I did!
Since we didn’t create the Git repository when the Xcode was offering. We shall create
repository, add .gitignore and create initial commit:
1 2 3 4 5 | |
Note
I would recommend creating repository without Xcode help. Because it will create no
.gitignoreand by it will commit a lot of junk to repository.Folders like
xcuserdatawill change frequently and polluting your repository with not needed files and even more in teams, it can overwrite another developer’sxcuserdataevery time with not wanted user data from other developer!
XCode Organizer
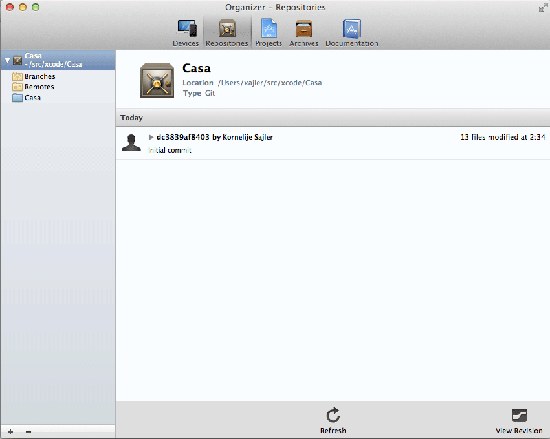
The Xcode Organizer is where the Repositories can be viewed.
Note
If you had a Xcode open during the creation of repository through Terminal, reopen the the Xcode because it will not detect the repository in Organizer.
To open Organizer go to Window > Organizer or with keyboard shortcut ⇧ ⌘ 2.
There should be a repository Casa:
Add Github Remote
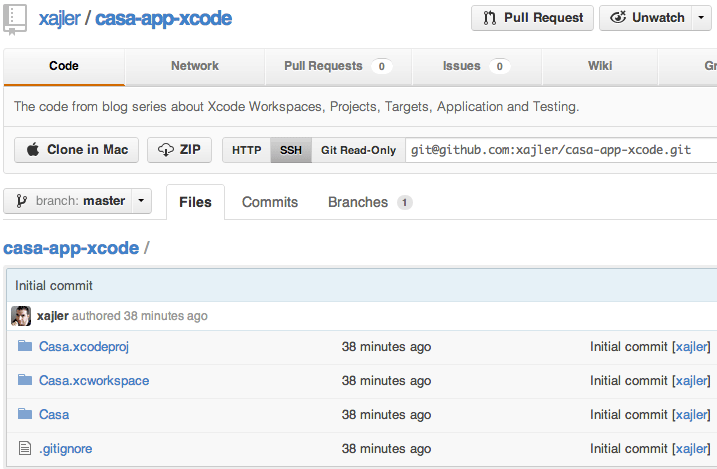
To add the Github remote so that we can push the commits to it, we first need to create a Github repository, I’ve already created repository casa-app-xcode.
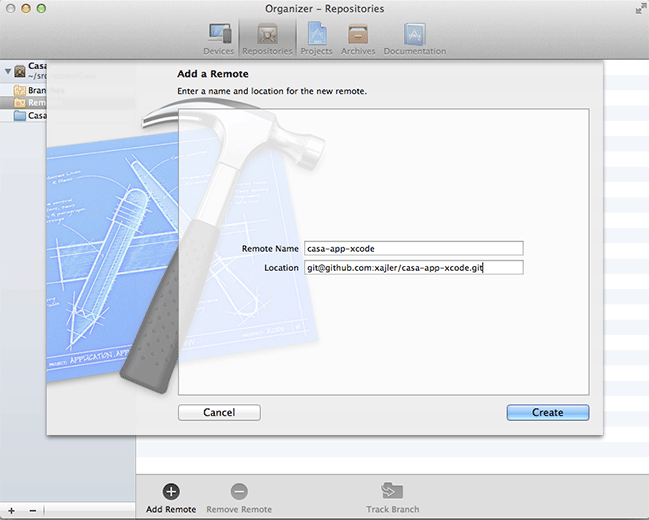
Let’s add this remote with Xcode:
- Go to Organizer Repositories.
- Select Casa repository.
- In Casa repository select Remotes.
- Hit the
Add Remotecircled plus button. - For Remote Name enter:
casa-app-xcode. - For Location enter:
https://github.com/xajler/casa-app-xcode.
Ignore the git username and password if you have Github SSH set up.
Push changes to Github
- Choose
File > Source Control > Push.... - Wait availe for first time.
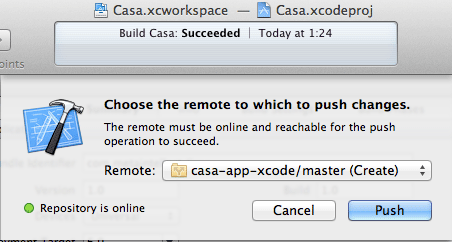
The commit is pushed to Githb.
Commiting changes with Xcode
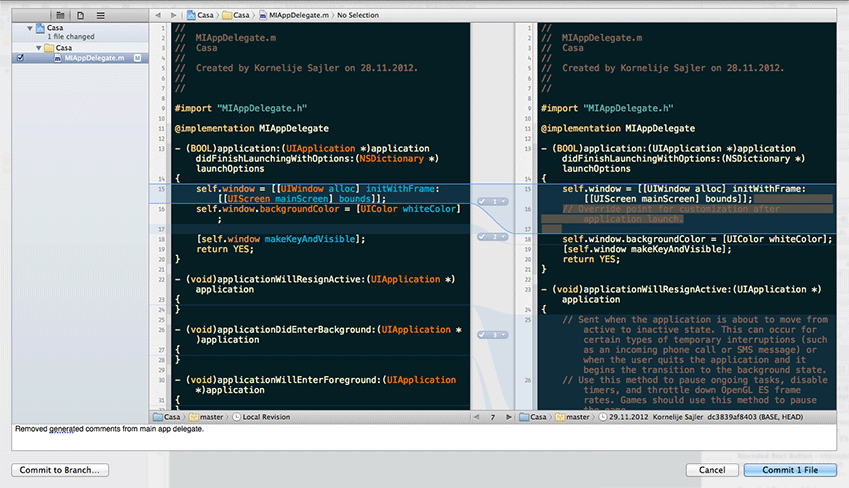
From the main app delegate MIAppDelegate.m we shall remove the generated comments and
commit it with Xcode:
- Applay changes to the
MIAppDelegate.mby removing commented code in methods. - Commit it by going to
File > Source Control > Commit...or use keyboard ⌥ ⌘ C. - Enter the commit message.
- Hit the
Commit 1 Filebutton.
- Push changes to Github repository.
Branching in Xcode
On commit it can be chosen to commit to branch with button Commit to Branch.... Where
the branch can be chosen or even newly one created.
Alternatively branches can be created in Organizer Repositories by selecting wanted
repository and selecting Branches, and hitting Add Branch button.
Diff in Xcode
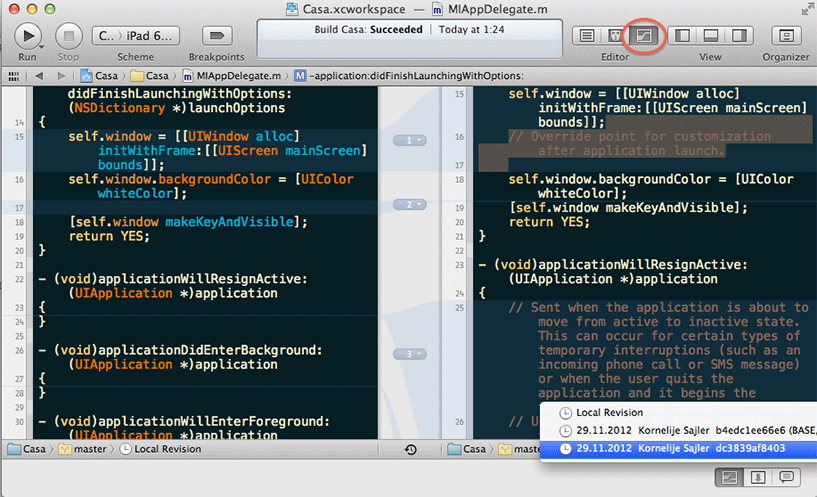
Anytime while coding the Version editor can be turned on to see changes with current HEAD
but also it is possible to change to past revisions.
Xcode Version editor is really nice and with visuals that helping in better understanding of the code changes.
Conclusion
As I said in last post Xcode 4 is great IDE, filled with lots of features. Respect to have Git as default Version control. The SVN is also supported, but who would want to use it in 21st Century. But in my opinion the Diff part is the greatest feature of it all!
But with all of this, I’m still not impressed with managing Git with IDE, and I will still be using my favorite iTerm2 to interact with Git and Github.
What’s next
So we past the Xcode project creation (from ground up!) and in this post the Version Control as Git and creating remote to the Github.
In next Xcode post we will have an broad overview of Xcode support of Testing. What Testing Frameworks are available, which is the default Xcode Testing Framework.
Look for the BDD Testing Frameworks and picking one for more in depth examine of it. And also the available Mocking Frameworks and its usage.